LDG

How to embed HTML5 into a native Mac OSX app

by Matt Hackett, 2011 Mar 15
How to Make a Video Game All By Yourself
Onslaught! Arena

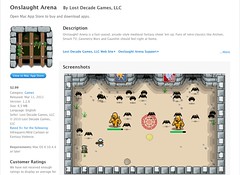
Our game Onslaught! Arena was only available on the Chrome Webstore when we first launched it. We recently announced that we had also launched the game on the Mac App Store, using the exact same source code. Isn't HTML5 awesome?

Many of you expressed interest in how to embed a WebView into a Mac app, and as promised, here's a detailed tutorial.

  1. Download Xcode onto your Mac. I was able to download it from Apple but it's also in the Mac App Store for $4.99, so your mileage may vary.
  2. Run Xcode. Mine is located in /Developer/Applications/Xcode.app.
  3. Make a new project. This can be done by using the menubar: choose File / New Project... / Mac OS X / Application / Cocoa Application / Choose ... then select the folder to save your project into. I'll use WebViewExample as the project name in this tutorial (but you can use whatever you want).
  4. In your Xcode window, under Overview / Groups & Files, expand WebViewExample / Frameworks by clicking the arrow icon.
  5. Right-click Other Frameworks and select Add / Existing Frameworks... / Webkit.framework / Add.
  6. On the same level as Frameworks, expand Resources by clicking the arrow icon.
  7. In a Finder window, locate your HTML5 folder (the folder containing your .html files, etc.) and drag it into this Resources folder in Xcode. Make sure to choose Create Folder References for any added folders.
  8. On the same level as Resources, expand Classes by clicking the arrow icon.
  9. Select WebViewExampleAppDelegate.h which will open it for editing in the right column.
  10. Edit the file to look like this:
    
    #import <Cocoa/Cocoa.h>
    #import <WebKit/WebKit.h>
    
    @interface WebViewExampleAppDelegate : NSObject  {
    	NSWindow *window;
    	IBOutlet WebView *webView;
    }
    
    @property (assign) IBOutlet NSWindow *window;
    @property (nonatomic, retain) IBOutlet WebView *webView;
    
    @end
    		
  11. Now select WebViewExampleAppDelegate.m for editing. Edit the file to look like this:
    
    #import "WebViewExampleAppDelegate.h"
    
    @implementation WebViewExampleAppDelegate
    
    @synthesize window;
    @synthesize webView;
    
    - (void)applicationDidFinishLaunching:(NSNotification *)aNotification {
    }
    
    - (void)awakeFromNib {
    	NSString *resourcesPath = [[NSBundle mainBundle] resourcePath];
    	NSString *htmlPath = [resourcesPath stringByAppendingString:@"/htdocs/index.html"];
    	[[webView mainFrame] loadRequest:[NSURLRequest requestWithURL:[NSURL fileURLWithPath:htmlPath]]];
    }
    
    @end
    		
    Note: in the line NSString *htmlPath = [resourcesPath stringByAppendingString:@"/htdocs/index.html"];, change the string "/htdocs/index.html" to your game's .html file.
  12. Under Groups & Files, select WebViewExample. Then, in the list to the right under "File Name", double-click MainMenu.xib (English). This will open Interface Builder (which should be located in /Developer/Applications/Interface Builder.app).
  13. In Interface Builder, find the Library window and select the Objects tab.
  14. Scroll down to find a row labeled "Web View - A Coca WebView" (hint: you can type "webview" into the text box at the bottom of this window to filter the results) and drag it into the WebViewExample window. (another hint: you can resize it and its containing window to whatever sizes you want. More info on this in future tutorials.)
  15. Find the "MainMenu.xib - English" window and double-click Web View Example App Delegate.
  16. Find the tools window (the one with six icons at the very top, it should be labeled "Web View Example App Delegate Identity"). Switch to the "Connections" tab (by pressing the second icon from the right -- it's a blue circle with a white arrow inside). Look under "Outlets". There should be only one row labeled "window". You'll come back to this in a moment.
  17. Go back to Xcode and press the Build and Run button (or press command+return on your keyboard).
  18. Go back to Interface Builder. In the "Outlets" section from before, you should now see a row labeled "webView" with an empty circle to the right of it. Press and hold your mouse down inside this empty circle. A blue line should begin to follow your mouse. Drag this blue line into the WebView object that you dropped into the WebViewExample window earlier. (When you hover over it, it should highlight in blue.) Release the mouse button and a connection should be established (this enables communication with your WebView).
  19. Save the file (File / Save or command+s).
  20. Return to Xode and Build and Run. You should see your app running inside the window that opens.
Onslaught! Arena

This example project is available on our GitHub page (I've included my old game Spacius! as an example). You can also download the generated WebViewExample app directly.

I'll post another tutorial soon on how to make a more complete app (EDIT : now available here!), including adding icons, enabling localStorage and building a bridge from JavaScript to Objective-C. Follow us on Twitter to get notified when we publish that tutorial.

Could you get it to work? Any steps I could change to make things easier to understand? Please let me know in the comments.

Follow author @richtaur

LDG © 2022 • BlogTerms of ServiceVideo Policy • v2.1.2