

You want a quick tutorial for making a SIMPLE game in HTML5? Let's walk through a SIMPLE game practically line-by-line! (If you're curious about my credentials, I made half of A Wizard's Lizard.)
Let's jump right in by walking through game.js. You can also play the game right here.
// Create the canvas
var canvas = document.createElement("canvas");
var ctx = canvas.getContext("2d");
canvas.width = 512;
canvas.height = 480;
document.body.appendChild(canvas);
The first thing we need to do is create a canvas element. I did this in JavaScript instead of HTML to demonstrate how easily it is accomplished. Once we have the element we get a reference to its context, which we use to issue drawing commands. Then we set its dimensions, and add it to document so it'll appear in the page.
// Background image
var bgReady = false;
var bgImage = new Image();
bgImage.onload = function () {
	bgReady = true;
};
bgImage.src = "images/background.png";
A game needs graphics, so let's load up some images!
I wanted to do this as simply as possible so it's just an Image instead of being wrapped up in a nice Class or something.
bgReady is used to let us know when it's safe to draw the image, as trying to
draw it before it's loaded will throw a DOM error.
We do this for each of the three graphics we need: background, hero, and monster.
// Game objects
var hero = {
	speed: 256, // movement in pixels per second
	x: 0,
	y: 0
};
var monster = {
	x: 0,
	y: 0
};
var monstersCaught = 0;
Now we define some variables we'll need to use later.
hero gets setup with speed which is how fast it'll move in pixels per second.
monster won't move so it just has coordinates.
Lastly, monstersCaught stores the number of monsters the player has caught.
// Handle keyboard controls
var keysDown = {};

addEventListener("keydown", function (e) {
	keysDown[e.keyCode] = true;
}, false);

addEventListener("keyup", function (e) {
	delete keysDown[e.keyCode];
}, false);
Now for input handling. (This is probably the first part that will trip up developers who come from a web development background.) In the web stack, it may be appropriate to begin animating or requesting data right when the user initiates input. But in this flow, we want our game's logic to live solely in once place to retain tight control over when and if things happen. For that reason we just want to store the user input for later instead of acting on it immediately.
To accomplish this we simply have a variable keysDown which stores any event's keyCode.
If a key code is in the object, the user is currently pressing that key. Simple!
// Reset the game when the player catches a monster
var reset = function () {
	hero.x = canvas.width / 2;
	hero.y = canvas.height / 2;

	// Throw the monster somewhere on the screen randomly
	monster.x = 32 + (Math.random() * (canvas.width - 64));
	monster.y = 32 + (Math.random() * (canvas.height - 64));
};
The reset function is called to begin a new game, or level, or whatever you'd like to call it.
It places the hero (the player) in the center of the screen and the monster somewhere randomly.
// Update game objects
var update = function (modifier) {
	if (38 in keysDown) { // Player holding up
		hero.y -= hero.speed * modifier;
	}
	if (40 in keysDown) { // Player holding down
		hero.y += hero.speed * modifier;
	}
	if (37 in keysDown) { // Player holding left
		hero.x -= hero.speed * modifier;
	}
	if (39 in keysDown) { // Player holding right
		hero.x += hero.speed * modifier;
	}

	// Are they touching?
	if (
		hero.x <= (monster.x + 32)
		&& monster.x <= (hero.x + 32)
		&& hero.y <= (monster.y + 32)
		&& monster.y <= (hero.y + 32)
	) {
		++monstersCaught;
		reset();
	}
};
This is the update function and is called every single interval execution.
The first thing it does is checks the up, down, left, and right arrow keys to see if the user has pressed them.
If so, the hero is moved in the corresponding direction.
What may seem odd is the modifier argument passed into update.
You'll see how this is referenced in the main function, but let me first explain it here.
modifier is a time-based number based on 1.
If exactly one second has passed, the value will be 1 and the hero's speed will be multiplied by 1, meaning he will have moved 256 pixels in that second.
If one half of a second has passed, the value will be 0.5 and the hero will have moved half of his speed in that amount of time.
And so forth.
This function gets called so rapidly that the modifier value will typically be very low,
but using this pattern will ensure that the hero will move the same speed no matter how fast (or slowly!) the script is running.
Now that we've moved the hero according to the player's input, we can check to see if it caused anything to happen.
If there was a collision with the hero and monster, that's it! That's pretty much the game.
We tally the score (+1 to monstersCaught) and reset the game.
// Draw everything
var render = function () {
if (bgReady) {
ctx.drawImage(bgImage, 0, 0);
}
if (heroReady) {
ctx.drawImage(heroImage, hero.x, hero.y);
}
if (monsterReady) {
ctx.drawImage(monsterImage, monster.x, monster.y);
}
// Score
ctx.fillStyle = "rgb(250, 250, 250)";
ctx.font = "24px Helvetica";
ctx.textAlign = "left";
ctx.textBaseline = "top";
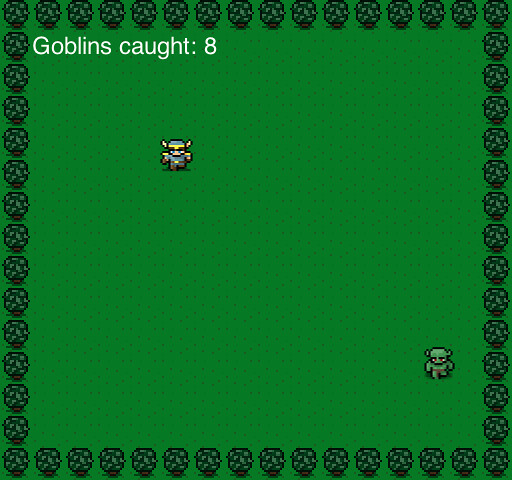
ctx.fillText("Monsterrs caught: " + monstersCaught, 32, 32);
};Games are more fun when you get to see the action going down, so let's draw everything to the screen. First we take the background image and draw it to the canvas. Repeat for the hero and monster. Note that the order is important, as any image drawn to the canvas will draw over the pixels under it.
Next we change some properties on the context related to how to draw the font, and we make a call to fillText to display the player's score.
As we don't have any complicated animations or movement, we're done drawing.
// The main game loop
var main = function () {
	var now = Date.now();
	var delta = now - then;

	update(delta / 1000);
	render();

	then = now;

	// Request to do this again ASAP
	requestAnimationFrame(main);
};
The main game loop is what controls the flow of the game.
First we want to get the current timestamp so we can calculate the delta (how many milliseconds have passed since the last interval).
We get the modifier to send to update by dividing by 1000 (the number of milliseconds in one second).
Then we call render and record the timestamp.
See also the Onslaught! Arena Case Study for more on game loops.
// Cross-browser support for requestAnimationFrame
var w = window;
requestAnimationFrame = w.requestAnimationFrame || w.webkitRequestAnimationFrame || w.msRequestAnimationFrame || w.mozRequestAnimationFrame;
Don't worry, it's not necessary to fully understand this part, but I thought an explanation of the looping code would be beneficial.
To continuously call the main game loop function, this tutorial used to execute the setInterval method. These days there's a better way, via the requestAnimationFrame method. However, as with most new web technologies, some code is needed to ensure cross-browser support. The polyfill I've included is a simplified version of the one on Paul Irish's article.
// Let's play this game!
var then = Date.now();
reset();
main();
Almost there, this is the last code snippet!
First we we set our timestamp (with the variable then) to seed it.
Then we call reset to start a new game/level.
(Remember that this centers the hero and places the monster randomly for the player to find.)
Congraulations! You now understand the basic fundamentals of game development (I hope!) using the canvas element in JavaScript. Try it out on your own: Play the game or fork the code on GitHub and get started hacking.
Dive into game development with Game Dev Medkit, a free pack of game development goodies.

LDG © 2022 • Blog • Terms of Service • Video Policy • v2.1.2